chicken legs

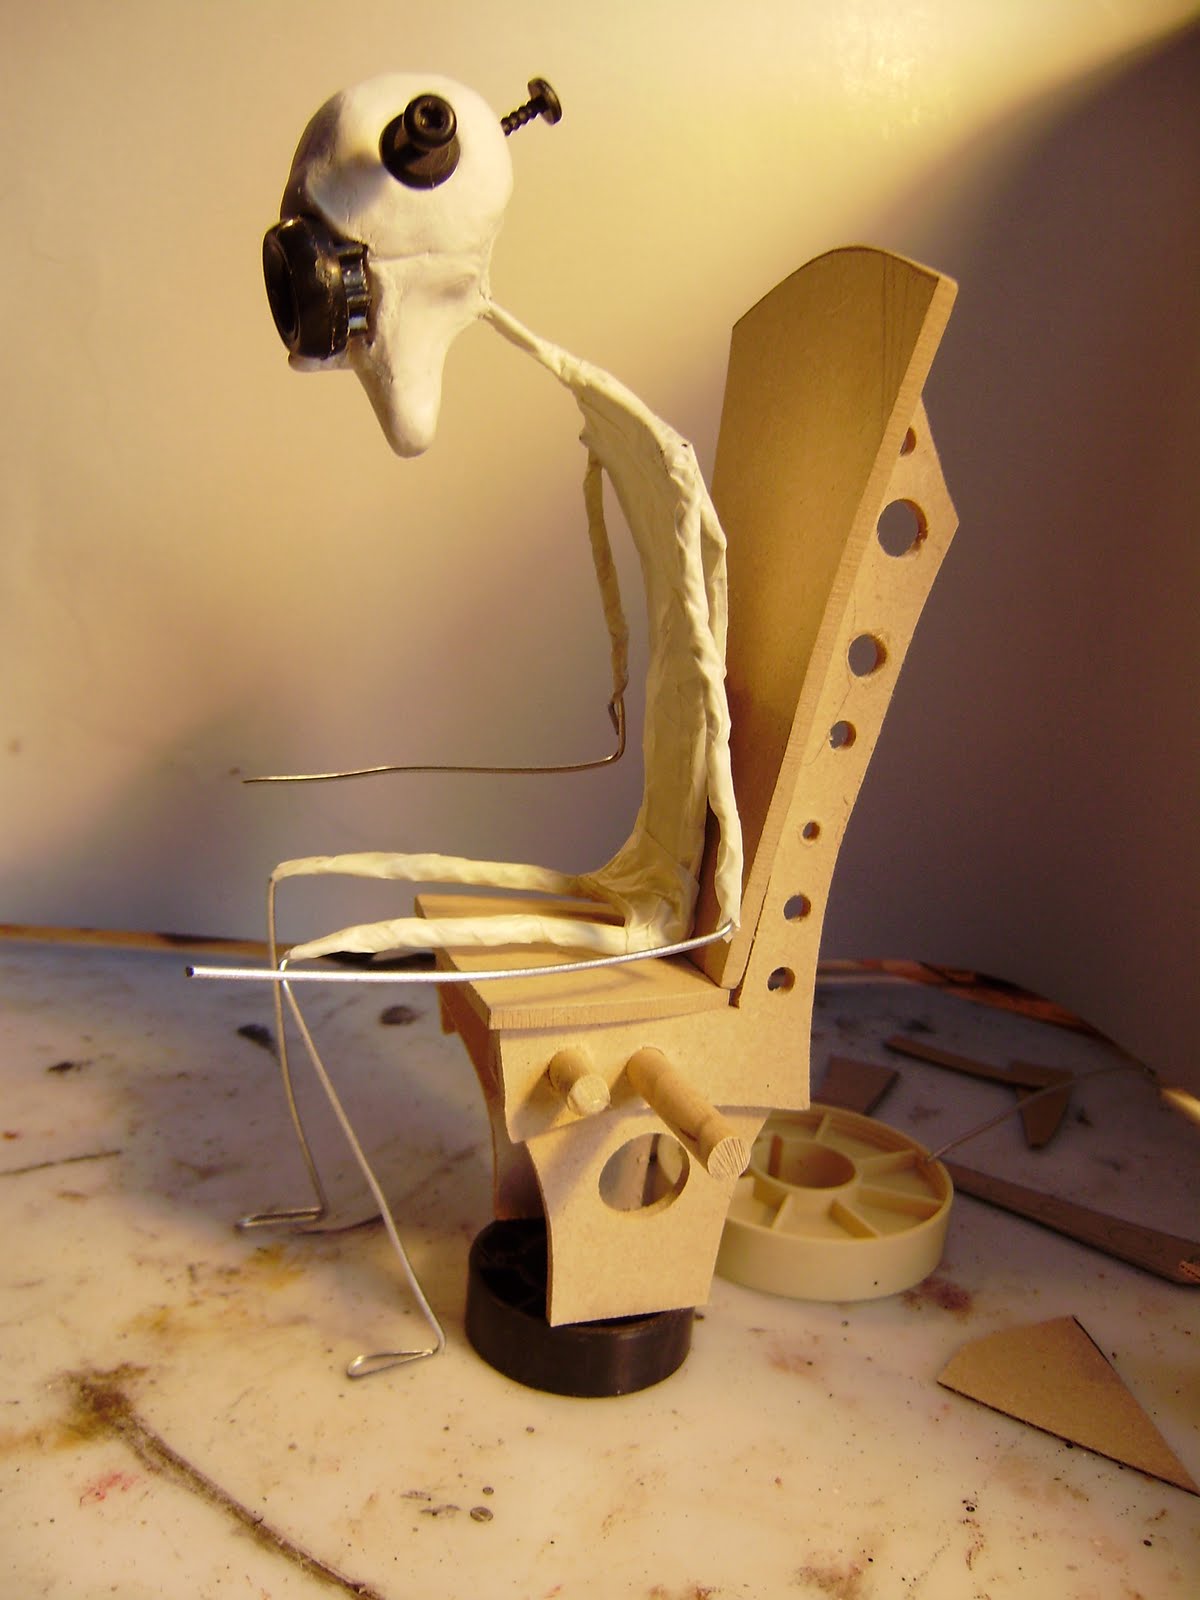
The two legged chair (I've seen this called chicken legs, presumably because of the jointing, but I can't say that it gives the air of menace I wnat from this figure!) has finally got past the basic construction and is now taking on the character I wanted. The legs need a lot more detail and gears etc to give a steam punk feel and I hope to add more consoles and arms to the chair but you can see where it's going.
The chair has been covered in plastiroc modelled to look like padding. The boiler is bits of plastic I've found wrapped in strips of card studded with split pins, you can't see it but the boiler is covered with strips of masking tape which when stained will look like planking.
I found some coiled plastic tube which I plan to have coming out of the figures back like feeding tubes.
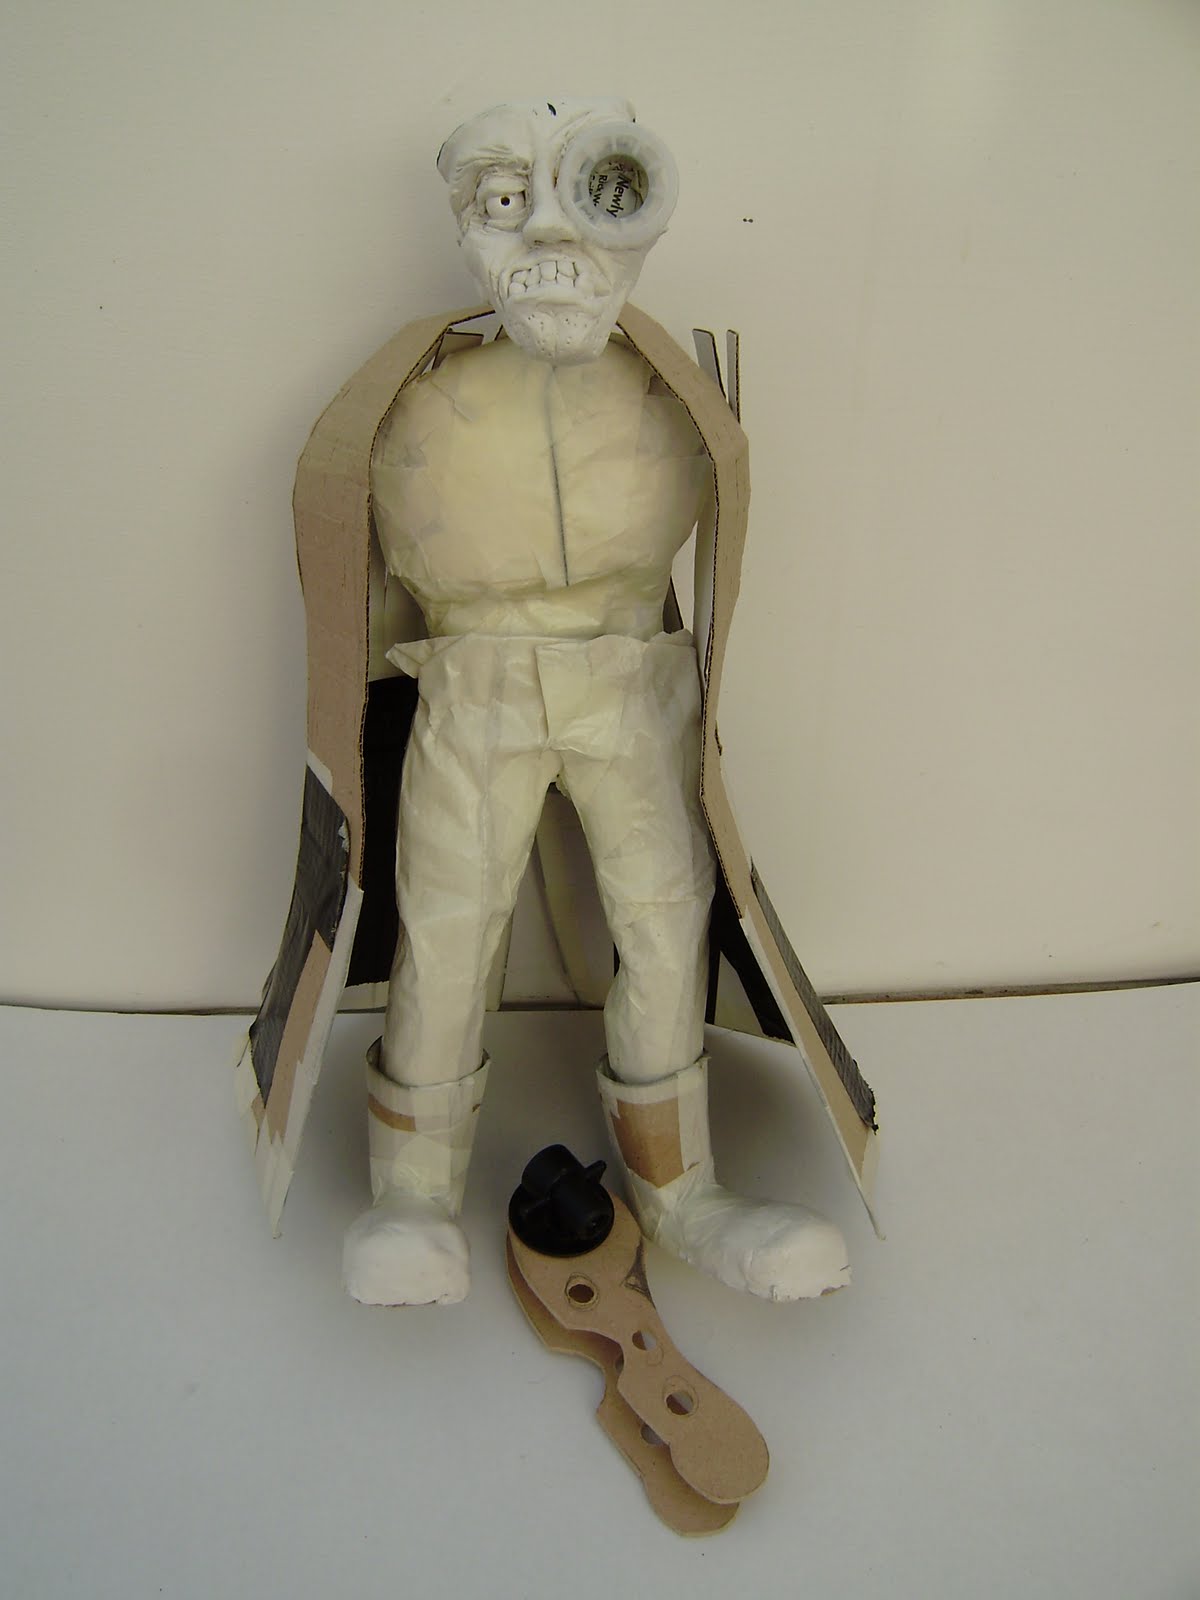
The figure is taking shape, he is a thin wire armature with almost no padding covered in tape to give him a gaunt skeletal look. He is awaiting a long coat and lots of straps and tubes.

steam punk cricketer

This was a modified version of my steam punk droid made as an xmas present for my cricket obsessed dad


2 legs easier than 6 (or is it 8?)

After a few attempts to make a spider legged base I just wasn't geting anywhere, mostly as it looked too bulky and didn't give the figure the precarious look I wanted. (I've since seen a lovely tripod design which would have been perfect)

Anyway keen to move on I sketched some designs based on animal legs, which look very much like Imperial walker legs because I guess that's where ILM got their design from, still looks good though.

I've used a basic mdf one piece leg which I'm adding too to give the effect I want. This was a quick and simple way of making the figure stand up so I could move onto adding the chair.
I need to figure out a way of creating some nice pistons so the legs look like they could function and add a boiler too the back of the chair. This will alos have lots of funky consoles and controls coming off it as well as some kind of foot support for the stooped figure. Not really sure how he will be finished, possibly lots of tubes coming off him.


Below are some images I found for inspiration. I love the metal jaguar by artist Andrew Chase
his work is amazing and well worth checking out.


spider chair

The last few months have been a creative vacuum, too tired and cold and with no clear ideas to get engaged with. Now school hols are here I feel revived. I've had the idea of some kind of robotic chair for some kind and while sat doodling some head ideas during a cover lesson yesterday I came up with a clear idea of a thin little guy on a chair with lots of controls which moves around on spider legs. Kind of a Davros like figure judging by the eloctodes sticking out of his head (I'm fed up of top hats)


While making the chair I sat the driver in 2 poses, one as intended stooped over the controls sat vertical, (as seen below) another with him led back in a more racing car pose. I like this second idea but was worried it was too much like the racers in Phantom Menace, maybe I'll make both.

automata delight

I was lucky enough to go to open house art exhibition today and saw some wonderful automata art work by Wanda Sowry who had opened her home for the day. I was greeted by two amazing automata on the hall wall and then a lovely cup of mulled wine (well mulled ribena as I was driving but it was still good). Wanda's automata can be seen by clicking on the image below.


Also on show were Robert Race's driftwood automata, very simple but so clever and effective. My personal favourite was a Trophy with moving eyes seen here (click to see more)


Both artists were really friendly and willing to share some their experience as well as let me take photos of their mechanisms. Wanda's skeleton figures have inspired me try a skeleton cricketer for my Dad's xmas present.


I've taken a break from the steam punk droid to finish a figure started over 2 years ago. The shape was there but he just needed a bit of work on the clothes and painting. Not sure why he was abandoned for so long but I like him. Perhaps once the call of automata has passed I will do some more like him as I haven't made this kind of work for years.

Should he wear a coat?

The droid is nearly done. A coat of paint and a few extra bits of scrap ahve made all the differnece. I'm really pleased with the new technique for making the coat too: it proves much easier to amke and more flexible to position.


I'm not sure if the figure needs it though, what do you think?


Steam punk droid nearly complete

I've spent the weekend spraying and putting a lot of the bits together so he is starting to look finished. I was worried that the top hat on it's own looked a bit odd, and that he looked like a reject droid from The Phantom Menace, so I've added a coat. I've tried making this out of paper and thin wire edging covered in masking tape. This has the benefit of being quicker and more flexible than the usual card I use. I'm reasonably happy with the result, it's certainly easier to change it's shape, but has minimal stength so no good for some other figures where the coat is part of the stucture.

The photos are not great but it was getting dark when I took these.


The ray gun has been shortened since last week. I found some good bits of plastic (an old pipe joiner I think) and really like the snub nosed look. I had a load of short thin straw like shapes (red) which make up the centre of the barrel. An old medical vile (courtesy as ever of the Scrapstore) filled with shower gel finsihes it off.

If you like Stteam punk ray guns check this video out from Doctor Grordbort's web site.

Steam punk droid

Firstly I want to direct you to a fascinating article called 'Towards a Steampunk Without Steam' by Amal El-Mothar over at Tor dot Com. It explores the values of the genre and challenges the concept that it is just brass, leather and goggles, worth a read and will get you thinking even if you don't agree with it.


Anyway after a week (it's been half term whoo hoo!) of fiddling and not getting to grips with anything that reall seemed to work or grab my enthusiasm I finally got an idea. I was sat at my desk staring at bits of junk and an old hat I'd made and not used for another figure when I realised they would make a great head and body for a robot. 24 hours later you can see the result.


Proves what Picasso said "Inspiration exists, but it has to find us working"
Typical that I get my inspiration just as I have to go back to work though!

mid term malaise

I'm at that point in the school term where my creative energy is at it's lowest, combine that with a piece that I just can't get to grips with means I haven't done much in my studio for a few weeks.


I remember an artist once saying that the best thing to do in these circumstances is just to do anything to get you going, stretch a canvas, anything. In my case I find just making the first thing that comes to mind helps, so here are the results of my art therapy!


I want my GCSE art class to make sketch book covers for a project on surrealism (the theme is strange materials, impractical objects, visual puns)

So we have a book with spines, a book made of stone,a sardine tin, a sliced loaf and a mouth. The result of an afternoons work to inspire year 10.


While researching images for Surrealism I came upon a sketch for a weird beast by Shaun Tan. If you don't know him he does amazing illustrated books, possibly for children)

Anyway it's a friends birthday soon so I thought they might appreciate a weird steam punkish creature. It will have legs and eyes soon.


Finally Mr Hyde, who is living up to his reputation as a troublemaker.

Mr Hyde

I was discussing with someone on Deviantart the idea of creating Steampunk characters based on well known novels. She suggested Oliver Twist. Fat too cute.. so Mr Hyde. I've already done a few doctor/scientist types so it seemed a good choice. Plus I wanted something with a big mechanical arm, a dangerous looking beast of a figure. I know Hyde is not mechanical but this is steampunk so lets assume that Jekyll's skill is not medicine but robotics; hence half man half machine.


Below are some pics to get me thinking (I've tried to include links to the artist's pages where possible):


I want to include some of my favourite elements such as a big Victorian greatcoat with shoulder cape, I used a plastic vial full of washing up liquid in my last figure's back and this would fit with Hyde, along with other mechanical bits in his back. Also a big mechanical arm dragging on the floor and big heavy boots all topped off with lots of straps and buckles.
I'm not sure about the face, goggles and respirator or a distorted human face, perhaps one side mechanical (terminator style)?

Steam Punk Gentleman finished


I had planned to show more images of this under construction but time was against me. I really wanted to get him finished before the school term saps my creative energy. Also I'm considering sending some saleable work to a new craft centre opening near Leicester so I need to create a few more imp heads. They are not hard but I will need to clear my desk which is a real mess with all the bits of junk etc from this figure.

Anyway I think this figure has worked well, I really like the bent body shape which shows off the cogs and a new idea (for me, but you see it in lots of Steam Punk work) which is a vial of liquid, actually washing up liquid! It's a bit yellow as I didn't have any green which would look better.
I'm really getting into the idea of lots of tubes and bits coming out of my figures. I've also added lots of bigger straps (a bit of an Edward Scissorhands influence here) to suggest that his coat has to be strapped over a mechanical body, and who knows how human he is under all that leather?
I would love to try one of these figures in metal or maybe clay (I have no skill or facilities here for the former) or even leather. I want to simplify the materials to make more of the body shape, for example 3 pieces of metal joined togehter for this would I think be great. I could make more use of the construction techniques eg bolts to hold the 3 pieces toghether would enhance the effect. I remember seeing a sculptor's work in Bristol many years ago who made big metal sculptures of robed figures using very simple styalised shapes: a mix of monk and 3D Klimt. I have some pics somwhere which I must uncover.
Will have to give this more thought as I want to create something more resilant. the card and mixed media sculptures look good but are very fragile.

more mechanical figures

One of the things I enjoyed creating with my last couple of figures was the mechanical bits coming out of their backs and the robotic arm. I have a few ideas for developing this, one is a bulky cyborg type figure, possibly a mechanical Mr Hyde, another is a development of the wheel chair bound figures, but this time with a smaller seat actually built into a giant robot, possibly with a wizened old man driving it.
However with school holidays nearly over and the restrictions work place on actually making anything complex I came up with a simpler figure of a bent old man with mechanical bits coming out of his back. This figure was originally inspired the electric cables coming out of the back of a piece by Stephane Halleux, I liked the body shape too. (kind of reminds me of Belleville Rendez-Vous)

Over the next few posts I thought it would be helpful to explain how I make a sculpture.

Here you can see the basic body taking shape. It is just a basic cardboard shell roughly taped with masking tape. I use quite thin corrugated card which is very flexible. The corrugations allow it to bend nicely in one direction, in this case they go upwards so the shape curves towards the rear. I sometimes score the card if I want it to flex in more than one way.
It takes a bit of playing to get the shape exactly as I want it but once I'm happy I reinforce with gaffa tape. The top of the shape which will become the hole in his back is reinforced with florist wire.
Here you can see two plastic shapes for goggles bound onto a piece of wire for the neck with a bit of newspaper to pad out the chin. I've used two bits of flexible palstic tube for arms with stiff wire inside so they can be bent into shape. I normally use rolls of card but I found this and thought it would look good for him to have thin arms.


Because the figure leans forward he kept falling over so I slit open the back and packed it with a lump of clay moulded to fit.


I've skipped a bit here to show the figure nearer its final incarnation with bits of plastic and cogs just poking out of his back. I had originally planned for him to be pushing some kind of cart with cables coming out but I like these slightly claw like walking sticks. They are just slotted into the arms so may change.